everything you need to know about 3-way switch wiring
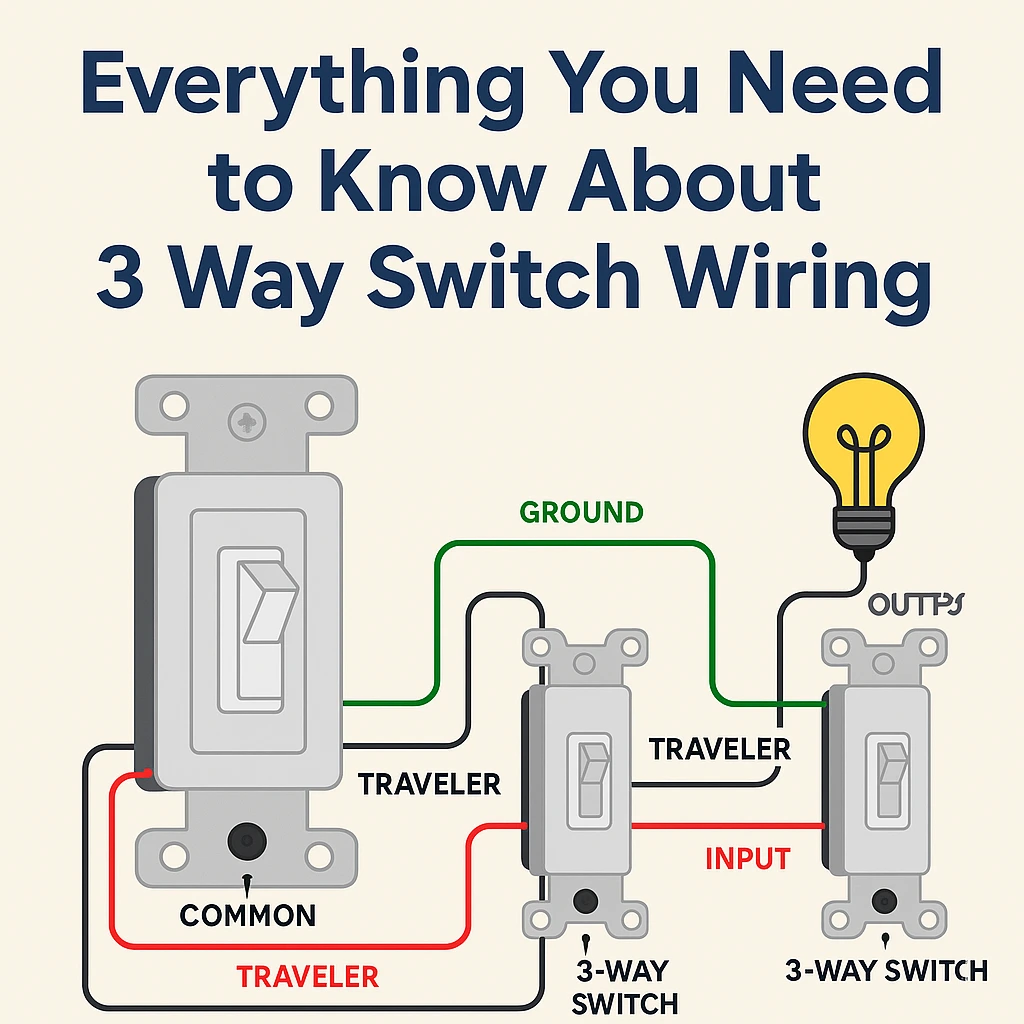
Mastering 3-way switch wiring is a fundamental skill for any homeowner looking to upgrade their lighting. A 3-way switch setup allows you to control one light from two different locations – common in hallways, staircases, and large rooms. Unlike a regular single-pole switch, which only has two terminal screws, a 3-way switch has specific components you must identify:
- A common terminal
- Two Traveler terminals
- A Ground screw
Understanding these points makes the wiring much easier, even for beginners.
diy difficulty summary
|
Difficult |
5 / 10 |
|
Time Required |
30 – 60 minutes |
|
Skill Level |
Beginner / Intermediate |
|
Risk Level |
Medium (electrical safety required) |
Tools Needed
You will need the following tools to safely wire a 3-way switch:
- Phillips and flathead screwdrivers
- Voltage tester (non-contact)
- Wire stripper
- Needle-nose pliers
- Electrical tape
- Wire connectors (wire nuts)
Common Causes of 3-Way Switch Wiring Problems
Most 3-way wiring issues come from simple mistakes made during installation. Common causes include:
- Travelers swapped between switches
- Loose connections in the switch box
- Common wire placed on a traveler terminal
- Neutral and hot wires crossed
- Damaged or old wiring
- Incorrectly wired light fixture
These mistakes usually lead to the light working only from one switch or not working at all.
Symptoms of Incorrect or Unsafe Wiring
A poorly wired 3-way system will show these signs:
- Light only works from one switch
- Light flickers when switches are toggled
- Sparks or popping noises
- Switch feels hot or smells burnt
- Switch does nothing at all
- Light stays ON or OFF permanently
If you see sparks, smoke, or melted plastic, shut off the breaker immediately.
Safety Warnings (Read Before You Start)
Even though this is a beginner-friendly project, you must follow basic electrical safety:
- Always turn off power at the breaker
- Use a voltage tester to confirm wires are dead
- Never mix neutral and traveler wires
- Do not touch bare copper while power is live
- Stop immediately if you see sparks or smell burning
- Do not attempt this project if your home has aluminum wiring, damaged wiring, or unmarked wires
If anything looks unusual, stop and call a licensed electrician.
How to Wire a 3-Way Switch (Step-By-Step Guide)
Step 1 – Turn off power & remove old switches
- Shut off the circuit breaker
- Remove wall plates and unscrew switches
- Use a voltage tester to ensure no electricity is flowing
Step 2 – Identify The Common, Travelers & Ground Wires
- Common wire (often black): attaches to the black screw
- Traveler wires (often red & black/white): attach to the brass screws
- Ground wire (bare copper): attaches to the green screw
Step 3 – Wiring Diagram Basics (Explained Simply)
A 3-way circuit has:
- Power source → Switch #1
- Travelers → Switch #2
- Output → Light fixture
Step 4 – Connect the First 3-Way Switch
- Attach the common wire to the black screw
- Attach the two traveler wires to the brass screws
- Attach ground wire to the green screw
Step 5 – Connect the Second 3-Way Switch
Repeat the exact process as the first switch:
- Travelers → Brass screws
- Common → Black screw
- Ground → Green screw
Step 6 – Install the Light Fixture Wiring
- Hot wire from switch → light hot terminal
- Neutral (white wire) → light neutral terminal
- Ground → fixture ground screw
Step 7 – Test the 3-wayt circuit
- Turn on power
- Flip each switch independently
- Light should turn on and off from both switches
When to Call a Professional
Stop and call a licensed electrician if:
- Wires in the box are not color-coded
- You have aluminum wiring
- Switches spark or smoke
- Breaker keeps tripping
- You are not sure which wire is hot, neutral, or traveler
- You cannot identify the common wire
Electrical issues can become fire hazards if done incorrectly.
Prevention & Maintenance Tips
To keep your 3-way switch system reliable:
- Tighten all terminal screws annually
- Replace worn or buzzing switches
- Ensure no wires are loose
- Keep moisture away from switch boxes
- If switches feel warm, stop using them and inspect
Troubleshooting Table
|
Symptom |
Likely Cause |
Quick Fix |
|
Light works only from one switch |
Travelers reversed |
Swap traveler wires |
|
Light stays ON |
Common wired to traveler |
Move common to black screw |
|
Light flickers |
Loose wire |
Tighten connections |
|
Switch feels hot |
Overloaded or failing switch |
Replace switch |
|
Breaker trips |
Short circuit |
Inspect wiring & replace damaged wires |
|
Light won’t turn on |
Power not reaching switch |
Check hot / common wire connections |